Wake-up-bright
Project – | Article by Maarten Tromp | Published , updated | 1921 words
Introduction
When I first heard about a wake-up light it sounded like something I would like to try. Gradually waking up with light to me sounds preferable over waking up with a loudly beeping device quite close to my head. But why buy when you can build? My build will be fully tweaked to my preference and only cost a fraction of a commercial unit.
 Wake-up-bright led lamp
This article featured on Hackaday.
In this article:
I run on solar power, apparently. In the winter when it's all dark outside, my energy is limited, but in the summer when everything is bright and sunny, I'm much more energetic. Waking up on those dark winter mornings is the worst. It's such a bad start of the day to open your eyes in the morning and not see any difference at all, everything is still pitch black. So when I first heard of a dawn simulation it sounded very interesting and I would like to try it for myself. Unwilling to buy an expensive alarm clock with built-in wake-up light and bird sounds, I set out to build one from parts I had on stock.
Since I would like to start using the lamp sooner rather than later, I decided to focus on the dawn simulation and not make a full alarm clock. A mains timer switch would take care of switching the dawn simulation on and off.
A few of years earlier I had worked on a chandelier that should be able to do this, but never finished the project. Another couple of years before that I woke up with sound instead of light; my computer would start playing music in the morning and slowly but steadily increase the volume to get me out of bed.
To slowly increase the brightness of a led you don't need complex electronics. The main parts are a power supply and a led. Dimming is done by a microcontroller and a fet. And this is exactly what you see in the schematic diagram.
The led is a 3 W RGB one, the brightest led I had in the parts bin, glued to a makeshift heatsink. Since I wanted white light, red, green and blue are driven in parallel. Power supply is generic 5 V, 1 A wall adapter, which is sufficient to drive the led. The processor is an Atmel AT90S2313 AVR, the same model I used in a several other projects. Switching is done by a FDP603AL logic level N-channel MOSFET, which is hugely overkill but this is what I had on stock and being logic level they are easy to work with. The processor outputs PWM which duty-cycles the led for the fade-in. The whole thing is build on perfboard.
For such a bright led you need a diffuser. It's painful to look directly into the led when it's on and I don't think it's very good for your eyes. A sheet of paper works fine for testing but it makes the build look like a heap of junk on my bedside table. So I bought an Ikea Lampan, the worlds cheapest table lamp, which is basically just a big diffuser. The light bulb socket came out easily and I sticky-taped the perfboard in its place. The result looked, well, like an Ikea Lampan on my bedside table.
Dawn simulation doesn't seem very complex so I decided to write write the firmware in assembler.
Your eyes perceive brightness in a logarithmic manner, but power to the led is regulated in a linear manner. To cater to your eyes' logarithm, the firmware need an exponential function for increasing brightness, which is its inverse. Writing one is not that hard, just multiply the PWM value with the same factor every once in a while. But how do you multiply on a processor that has no multiplication? The simplest solution I could come up with is to shift your value a couple of bits down and add that to the original value. PWM uses 8 bit values, so I used two 8 bit registers as a single 16 bit register. The high byte starts at a value of 1 and is outputted via PWM. The low byte is mostly a scratch pad for the exponential function. For each next step the high byte value is added to the low byte and the carry bit is added back to he high byte. Effectively this multiplies the value of the 16 bit register by . This multiplication is done every couple of seconds. After 256 iterations, the high byte has a value of 2. After 128 more iterations, it has value 3, after 85 more it has value 4, etc. This results in an exponential increase of brightness, which is perceived by the eye as linear. After about 3000 iterations the maximum value is reached. To have 15 minutes fade-in time, you need to multiply at .
Debugging and fine-tuning
When I first tried the lamp, the electronics had some stability issues. Every time the led came on the processor would reboot. It turned out to be caused by a voltage drop on the 5 V supply, which was shared between power led and the processor. The addition of a big capacitor close to the processor fixed all reboot issues.
The use of 8 bit PWM resulted in quite big steps in brightness, especially at low levels. The processor also supported 10 bit PWM, so I updated the firmware to use it and allow for smaller steps. This certainly was an improvement. The steps were no longer annoying, merely noticeable.
The lamp would sometimes flash brightly for a fraction of a second after power up. I first thought this was an issue with the electronics, but it turned out to be firmware. The code sets the led pin as PWM output, but assigns a PWM value only after the first timer interrupt. In the mean time brightness was set to whatever happened to be in the PWM registers at power up. After properly initializing the PWM registers early on in the code, sometimes a flash still remained. It turned out the PWM registers are double-buffered, this means that new PWM values only take effect at the start of a new PWM cycle. The random brightness value does not get overwritten until after the first cycle is completed. This is fixed by initially setting the led pin to input so the PWM does not have any effect. The timer interrupt that updates PWM values now switches the led pin to output. After this there were no more flashing issues.
It took a bit of experimenting to find out how long the fade-in period should be. With the time set to 5 minutes it felt like the lamp came on at full brightness, abruptly waking you. On the other hand, with fade-in time set to 30 minutes I started getting very sensitive to light intensity changes in the morning. Even the wind flapping the curtains would wake me up. With a bit of experimenting I found out that 15 minutes works best for me, so this values is hard-coded in firmware. The process was nearly identical to the fine-tuning of my musical alarm clock script.
The first few mornings I woke up, by myself, half an hour before the lamp would switch on, excited to see it happen. Luckily, after a couple of early mornings, I would actually be woken up by the light. This wake-up light made all the difference I hoped it would make. It really helps me a lot to wake up in a brightly lit room instead of a pitch black one.
Led upgrade
After 2 dark winters of using the lamp I decided to upgrade. Even though the lamp was quite bright, I would like it even brighter. So I started building a brighter one, while keeping the old one in place. This way I could work and experiment without losing a working version for waking me up.
The new version would be nearly identical to the first one, but with a brighter led. So I started looking into bright leds and ended up buying a 10 W 700 lm warm white led. The led was mounted on an old CPU heatsink to deal with the extra heat. Power supply was upgraded to 12 V, 1 A to deal with the required voltage and power. For easier programming an AVR ISP connector was added as well.
This new led was as bright as I had hoped. The warm white colour was also a lot nicer than the eerie white light you get from RGB leds. But with the brighter led, the steps became quite noticeable again. However the advantage of having more light far outweighed this.
With the new lamp finished, I no longer needed the old one. So I gave it to my friend Lara to try it. She had been following the build and after all my positive stories she would like to try it as well.
Processor upgrade
Working on an unrelated project I found out that the Atmel ATtiny2313, successor to the AT90S2313, supported 16 bit PWM. This could fix the visible step issue the lamp was having. So I ported the firmware to ATtiny2313 and updated it to use 16 bit PWM. The processors are pin compatible, so no other hardware changes were needed. The problem with visible steps was fixed once again.
Making yet another one
A few years later I decided to do yet another upgrade. This time it would be even brighter in an attempt to light up the entire room, instead of just around my bedside table.
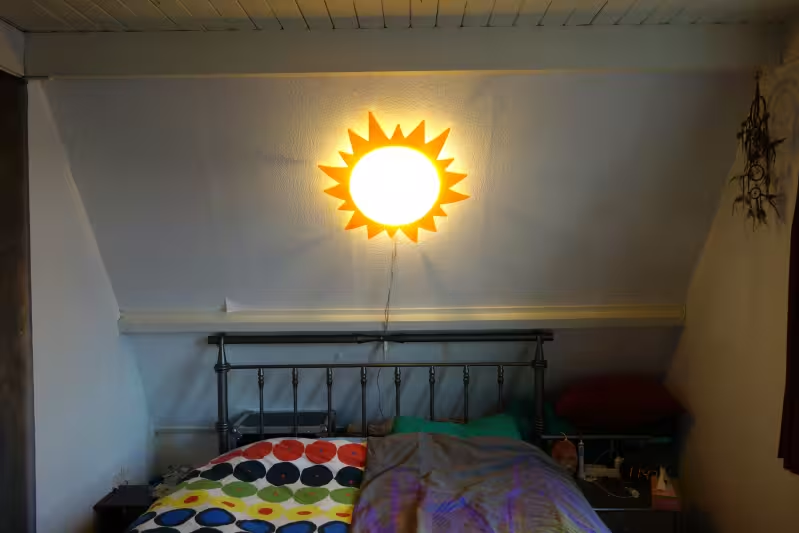
The enclosure came from Ikea once again. We came across the Smila Sol, a sun shaped and coloured children's ceiling lamp, and it seemed appropriate for dawn simulation.
Instead of using a single even brighter led, I used three 10 W leds, placed next to the bulb sockets. The leds and fet are pop riveted to the metal back part of the enclosure, which is used as heat sink. Unfortunately I had left my heat paste in the server room at work, so the parts are mounted without.
The bulb sockets and bulbs are left in place, so the lamp can still be used as originally intended by Ikea.
To deal with the increased power needs, the power supply is now upgraded to 12 V, 3 A from an old computer monitor.
The mains timer switch is replaced with a newer model with has a less noticeable click.
The new and improved wake-up light is an improvement indeed. Now I wake up every morning, looking in the face of a happy sunny lamp. It's a lot brighter indeed and manages to light up most of the room, but that's also because the lamp is higher up on the wall now.
The lamp in this article is developed using free and open source software and hardware where possible. Firmware is written using Vim, programmed with AVRDUDE and USBasp.
In turn this design and article are released into the public domain. You can find all relevant files in the downloads directory of this article.
Like I mentioned before, dawn simulation is a big help for me on those dark mornings. I would highly recommend building (or buying) something similar to everyone who has seasonal affective disorder (SAD) or just likes to wake up in a nicely lit room instead of with a loud beeping device right next to their head.
Looking back at the revision history I noticed that nearly all adjustments to the build are done in October. So every year, when the mornings are getting noticeably darker, I start using the lamp again and improve on the build a little.